Understanding L Tracks and Single Stud Fittings
What Are L Tracks and How Do They Function?
L tracks or logistic tracks come in aluminum or steel and have this distinctive L shape that makes them perfect for creating adjustable anchor points when managing cargo. What really works about them is the long groove running along the track which takes those special fittings. These fittings just slide right in and lock tight, giving much better flexibility for securing loads inside trucks, trailers and across various industrial settings. A recent look at industry data from 2023 shows something pretty impressive actually. Companies using these systems report around 64% fewer instances of cargo shifting during transport compared to older methods with fixed tie down points. Makes sense why so many businesses are making the switch nowadays.
Single Stud Fitting vs. Double Stud: Key Differences
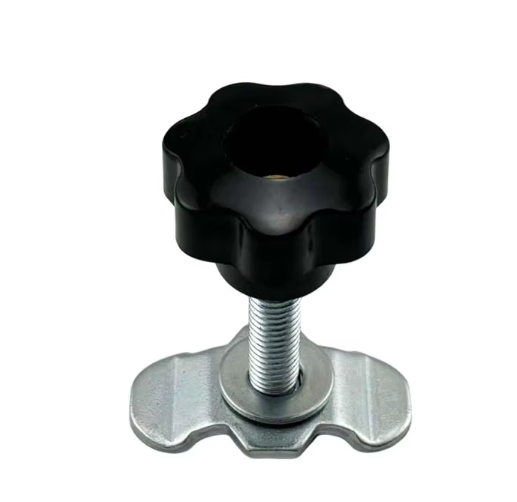
The single stud fitting has just one engagement tab that fits into the groove of an L track, whereas double stud versions come with two tabs which makes everything much more stable overall. When it comes to weight capacity, standard single stud fittings can handle around 2,000 pounds of static load without issues. Double stud models though? They give about 65 to maybe even 80 percent more resistance against sideways forces. That extra strength means these are generally preferred when moving heavier machinery around worksites. Both kinds work with similar cam locking mechanisms, but what sets them apart is space considerations. The single stud version takes up less room so installers can get things done quicker in tight spots where there isn't much elbow room.
Core Components of an L Track System and Their Roles
A complete L track system includes:
- Track Channel: The base rail, typically made from extruded aluminum or stamped steel
- Stud Fittings: Removable anchors (single or double-stud) that secure cargo straps
- Locking Mechanism: A spring-loaded pin or lever to fix fittings in place
- Fasteners: Screws or rivets for mounting the track to surfaces
- Accessories: Tie-down rings, winch plates, and adapters for specialized loads
Proper alignment among these components ensures optimal force distribution. Load testing shows that correctly installed systems maintain 98% of their rated capacity under dynamic stress.
Tools, Hardware, and Safety Preparation for Installation
Essential Tools for Attaching Single Stud Fittings to L Tracks
Having the right tools makes all the difference when it comes to getting things installed properly. Start with a quarter inch drive torque wrench set between 30 to 50 Newton meters if possible these help keep those bolts just tight enough without stripping them. Don't forget the 6mm Allen key either since it's needed for making those fine adjustments on the fittings themselves. When seating components into place, grab a rubber mallet instead of metal ones which can scratch up surfaces accidentally. Most folks find an L-shaped alignment gauge really handy too because it keeps everything spaced evenly across the board. And remember what most pros will tell anyone who asks anything about this stuff: once we're talking about runs longer than 1.8 meters or around six feet, nobody gets away with skipping out on a good quality laser level. Last but definitely not least, deburring tools should be part of every kit. Those little cutters save headaches later on by taking care of those annoying sharp edges that always seem to pop up after cutting materials.
Recommended Fasteners and Mounting Hardware for Secure Fit
Pickup truck beds that get shaken up a lot need something solid. Stainless steel M8 bolts paired with those nylon insert lock nuts tend to hold up best against constant vibration. When working with composite materials, go for 12.9 grade zinc plated screws along with split washers underneath. They grip better and won't back out as easily over time. If dealing with pre-drilled tracks, barrel nuts are great because they let folks adjust things without digging through tools every time. And for temporary setups like rental vehicles where nothing stays forever, adhesive backed mounting pads work wonders. Look for ones rated around 70 psi shear strength or higher. These stick pretty good but still come off when needed without damaging anything underneath.
Safety Equipment and Workspace Setup Best Practices
| Safety Component | Purpose | Minimum Requirement |
|---|---|---|
| Impact-resistant goggles | Debris protection during drilling | ANSI Z87.1 certification |
| Cut-resistant gloves | Sharp edge handling | Level 4 ASTM F2992 |
| Anti-vibration mat | Extended kneeling comfort | 50 mm closed-cell foam thickness |
Maintain workspace lighting at 500 lux for accurate measurements. Mark fastener positions with UV-stable chalk for outdoor setups. Secure the L track in a bench vise or clamping jig before attachment to prevent movement during installation.
Step-by-Step Guide to Installing Single Stud Fittings on L Track
Positioning the L Track on the Desired Surface
Clean and level the installation surface—whether metal, wood, or composite. Align the L track parallel to structural edges for optimal weight distribution. In pickup truck beds, space tracks at least 12 inches apart to accommodate standard cargo straps. Use a chalk line or laser level to ensure straight alignment.
Securing the L Track Using Mechanical Fasteners or Adhesive
| Method | Best For | Max Load Capacity | Removal Difficulty |
|---|---|---|---|
| Mechanical Fasteners | Heavy-duty applications | 1,500 lbs¹ | Moderate |
| High-Strength Adhesive | Delicate surfaces | 800 lbs¹ | High |
Drill pilot holes ¼—smaller than the fastener diameter to prevent stripping. With adhesives, apply in a zigzag pattern to maximize contact area and allow 24 hours of curing time before loading.
Aligning and Inserting the Single Stud Fitting into the Track Groove
Rotate the fitting’s collar to the “unlocked” position. Insert the stud at a 45° angle into the track groove, then pivot downward until flush. Test for proper seating by sliding the fitting laterally it should move smoothly without wobbling.
Locking the Fitting in Place with Integrated Mechanism
Twist the collar clockwise until an audible click confirms full engagement with the track’s locking channel. A properly secured fitting requires 8–10 lbs of torque² to rotate when locked, ensuring reliable retention under load.
Testing Stability and Adjustability of the Installed Single Stud Fitting
Attach a rated cargo strap and gradually apply tension up to 200 lbs. Verify the fitting shifts no more than …” under load. Check adjustability by sliding it along the track and relocking at different positions to confirm seamless operation.
¹Based on ASTM D7148-21 standard for cargo restraint systems.
²Per SAE J1338 guidelines for transportation hardware torque limits.
Surface-Specific Installation Tips for L Track Systems
Installing L Track on Pickup Truck Beds and Trailers
When installing Position L tracks, make sure they run alongside the sides of pickup truck beds and trailer compartments so people can easily access tie down points when needed. For those weaker or more flexible truck beds that are 1/8 inch thick or less, adding some kind of backing plate behind them really helps stop them from bending out of shape over time. When working on composite material beds, drill those pilot holes about 5 to maybe even 10 percent smaller than what the actual screws or bolts will be. This prevents cracks from forming around where things get fastened. Always check how the tracks line up with whatever cargo needs to go there before tightening everything down permanently. Most folks mess this up right at the start actually. A study published last year in the Transport Equipment Journal found that nearly nine out of ten alignment problems happen during installation itself.
Surface Compatibility: Metal, Wood, and Composite Bed Materials
Installation methods must match surface material:
| Material | Key Requirement | Ideal Fastener Type |
|---|---|---|
| Steel/Aluminum | Anti-corrosion coating | Stainless steel bolts |
| Hardwood | Pre-drilled pilot holes | Coarse-thread lag screws |
| Composite | Abrasion-resistant adhesive backing | Epoxy-bonded anchors |
On wood surfaces, apply waterproof sealant around fastener entries to prevent moisture ingress—a factor in 39% of track failures in marine environments (Cargo Security Report, 2022).
Adhesive Bonding vs. Mechanical Fastening: When to Use Each
For installations where penetration isn't possible, adhesive bonding works really well, especially on things like insulated walls inside refrigerated trailers. Modern structural adhesives can actually handle shear strengths between around 650 to 800 psi which is pretty impressive. But when dealing with serious loads over 1,200 pounds per square foot, mechanical fasteners still have their place in heavy duty situations. Before going all out with any bonding project though, it makes sense to do a quick test first. Take a small section about 2 by 2 inches, apply whatever bonding agent we're using, let it sit for a full day to cure properly, then check how strong that bond really is. This simple step can save a lot of headaches down the road.
Using and Maintaining Single Stud Fittings with Tie-Down Accessories
Attaching Removable Tie Down Rings to Single Stud Fittings
The single stud fitting makes cargo securing much faster since it lets people attach tie down rings quickly. Just push the bottom part of the ring into the slot on the fitting and twist it about a quarter turn to lock everything in place. No need for threading or extra hardware, which cuts down on setup time maybe around 35-40% faster than old school methods. When dealing with stuff that weighs anywhere from 500 to 1000 pounds, make sure to get rings that are properly rated for those weights. Position them at right angles relative to the track so they don't slip sideways when things get bumpy during transport.
Adjustable Anchor Points for Dynamic Load Management
The repositionable single stud fittings allow quick adjustments on the fly, which makes them great for handling oddly shaped items such as motorcycles or heavy construction equipment. When installing these, keep the fittings spaced within 24 inches of each other along the track so the force gets spread out properly. Here's something important to remember: when things are moving around in transport, dynamic loads can actually push sideways with forces reaching 1.5 times what they weigh sitting still. That means regular checks and tightening are necessary. Grab a 3/8 inch torque wrench and set it between 25 to 30 foot pounds for best results. This helps maintain that secure grip throughout transportation.
Best Practices for Load Security and Long-Term Fitting Maintenance
Check those fittings at least once every quarter looking for any signs of wear, cracks forming, or corrosion starting to build up. Once or twice per year, apply some dry silicone lubricant into those track grooves to cut down on friction when making adjustments later on. Stay away from abrasive cleaners or anything with acid in them since they'll eat away at that protective anodized coating over time. When dealing with weights above 800 pounds, always use fittings paired with double reinforced straps. Any parts that show even half a millimeter of deformation should be swapped out immediately. Stick to these maintenance routines and most systems will last anywhere from three to five extra years in service while keeping their ability to hold loads reliably around 99 percent throughout that period.
Table of Contents
- Understanding L Tracks and Single Stud Fittings
- Tools, Hardware, and Safety Preparation for Installation
-
Step-by-Step Guide to Installing Single Stud Fittings on L Track
- Positioning the L Track on the Desired Surface
- Securing the L Track Using Mechanical Fasteners or Adhesive
- Aligning and Inserting the Single Stud Fitting into the Track Groove
- Locking the Fitting in Place with Integrated Mechanism
- Testing Stability and Adjustability of the Installed Single Stud Fitting
- Surface-Specific Installation Tips for L Track Systems
- Using and Maintaining Single Stud Fittings with Tie-Down Accessories